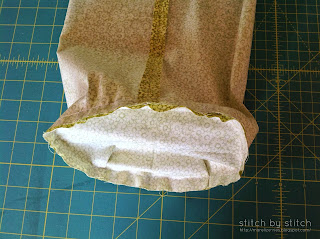
I have finished up my second african flower crochet bag, and thought I'd share with you how I've made the lining. The pattern for the crochet bag can be found HERE, keeping mind that I used this tutorial to make the flowers.
I find it is easier taking measurements of your bag before the bottom is sewed on to the body of the bag. So before your bag is completely stitched up, do the following:
Measure from the top of where the lining will be sewed on (just below the drawstring area), to the bottom. Add at least 2 inches for the seam allowance, ½ inch for the bottom, and 1½ inches at the top that will be folded over. When measuring the width, you'll need to multiply it by 2, then add 1 inch for your seam allowance.
In this case;
8 + 2 = 10 inches high
9½ x 2 = 19 + 1 = 20 inches wide
Fold the lining in half width wise, and with right sides together sew at least a ½ inch seam allowance. To check of it will fit properly, place it inside the bag and make adjustments before sewing on the bottom.
Make a template of the bottom of the bag, I used two pieces of printer paper, sticking them together using clear tape. Then pinning the crochet bottom piece to the paper, mark ½ inch seam allowance around the circle.
Then pin the template on top of your fabric and cut right against the pattern. You'll then need to add 'markers' to the bottom and bag lining, by folding the fabric in half, finger pressing or using a hot iron, fold in half again and press.
Match up the creased lines, right sides together and pin. You'll notice that the circle is bigger than the bag, fold in pleats between the pins, and secure it properly. Then sew it together using ½ inch seam allowance.
Since the bottom of your finished crochet bag forms a round shape, kind of like a 'bowl', the pleats of the lining will give the same result. Fold over at least 1½ inches of the bag lining over and press to have flat and even straight seam to sew onto your bag.
Place the lining inside the bag, and hand sew the lining to the crochet bag. Keeping in mind to grab the yarn with every stitch. Keep the stitches really small to make sure its properly secured.
This bag is really small, but the process and steps would apply to a larger bag as well. Hope you enjoy making your very own bag.
* My posts delivered to you *


13 comments:
Beautiful !!!
Anna
Wow! that is one beautiful bag. I totally love the handles too!
Have to checkout your tutorial.
What a great tut! Such a beautiful bag. Congrats on such a great finish!!
This a beautiful bag and great tutes :)
Great finish on your crochet bag Marelize. Love you crochet purse/bag creations!
Wonderful tutorial, such a cute bag!
Your bag is absolutely gorgeous!
Beautiful bag, thank you for the tutorial!
Your bag is beautiful x
Beautiful with nice colors.
Lisa
Love the bag!! And thank you for the tutorial. Always wanted to learn how to make the lining.
I wanted to invite you to the {Handmade Café} Link Party, the new and very unique linky! I hope you'll join us and link up. You will meet many exceptional international crafters/bloggers!
Oksana @ Oksana Plus Hobbies
http://oksanalikesit.blogspot.com/
Love this Marelize! Thanks for the awesome tutorial. Hugs, Karen
You brought such wonderful memories back for me, as this post reminded me of a bag my grandmother made me when I was little that was very similar to this one. I carried my little dolls around in it everywhere I went!!! Yours came out beautiful!
Post a Comment