Showing posts with label FMQ Friday. Show all posts

Friday, 9 August 2013

Karli's Quilt - True Love

I've started piecing this quilt little over three months ago and I am happy to say its at last finished.  I don't think I've ever made a quilt with such care and attention to detail as this one.  


This is the first quilt I've made for a customer, and even though its a paying job its still a labour of love.  I have enjoyed every moment in making this quilt and by far I am most proud of this one.

This quilt's name is 'True Love', not only does the hearts symbolize love, but it also is a reminder of the love felt, even from the first moment when she learnt she was pregnant.  For this Mom to be, she is so overwhelmed with love and emotion for her unborn baby, due in September, that I think this quilt be a beautiful reminder of how she felt even before she is born. 

'Louise, I hope you 'love' this quilt, just as much I loved making it.  May you have a beautiful, healthy, strong and happy baby.  She is going to be the luckiest baby girl, having a Mom like you, and may all your hopes and dreams for her come true...  God bless '    


For this quilt I used Willow Jelly Rolls and Layer Cakes by My Mind's Eye for Riley Blake and main green yardage of the same range for the backing.

Piecing and quilting was done on my Bernina.

For the free motion quilting I used Colourful Embroidery Thread no C1181, I've quilted, stippling, swirls, feathers, connected circles and pebbles.

The finished quilt measures 65 x 77 inches (165cm x 195cm)

Here are some tutorials for creating the two sided hearts, padded hearts using batting and how I hand baste my quilts.  I've also included a link to a video showing you how I've quilted the circles inside the sashing.  Just click on the images below to direct you to that blog post.


Pattern used for this quilt is in a local magazine 'Craftwise' issue 83 Jan/Feb 2012 called Meadow Friends.

For all other blog posts on this quilt click HERE.

Happy quilting.


Friday, 12 July 2013

At last...


...I can move on to quilting the borders.  Whenever I step back and look at what I've quilted so far, I am amazed.  Sure it took a bit longer than expected, but its all down hill from now.  My quilting is not perfect, but it blends into the fabric so well, that it is not even noticeable if my swirls ended up a bit wonky or is not completely even spaced, it still looks good to me.  I love this quilt!


As I removed the quilt from my machine I noticed that I've missed one block's sashing, so after I am done with that I can start quilting the borders.  I am really excited to start, I have decided on feathers, but because there are appliqued hearts I am going to keep them small, moving from one heart to the next, and filling up the space with random swirls and pebbles.  Its still a thought process, so I am sure once I get there, I'll know exactly how it will all fit in.


I recieved a comment today on Instagram from Rene Sharp at  Stamping in Sunny SA and she said:  "I want to quilt like you one dayand for me its probably the best compliment ever!  Thanks so much to everyone supporting me, reading my blog, leaving comments and following along on my progress.  It means the world to me!


If you are interested to read more about this baby quilt, click HERE.

Happy quilting.

Friday, 21 June 2013

Just a bit overwhelmed

I decided to take a week practicing some random free motion quilting that I'm comfortable with, thinking that once I have the baby quilt I'm working on sandwiched and ready for quilting that I'll know  exactly  what I want to quilt and where.  Now more than before I am at a loss, I just cant decide.  Hopefully once I have it tucked underneath my machine I'll know exactly what I want to do..

At least the practicing turned, what would have been just another sample ending up in my drawer, into something pretty.  During the week I showed you how this little Dresden Plate was 'born' out of some scraps my Mom gave me from a quilt she made a few years ago.  The finished Dresden Plate sampler measures 20 x 17 inches.  


It is filled with lost of different fmq, I even tried to be creative with one of the feathers.  Admittedly I enjoy quilting feathers but I guess I should stick to what I know instead of trying to be fancy.  It came out fine I guess, but I prefer it being simple and curvy and not so dramatic.


I did have fun making this, my oldest Son even suggested I make another to hang beside it, we'll see, for now I have to get busy binding the baby quilt and seriously start planning out what I want to quilt.  Any suggestions?


Linking up to:  


Happy quilting.

Friday, 10 May 2013

2013 FMQ Feathers Challenge #3


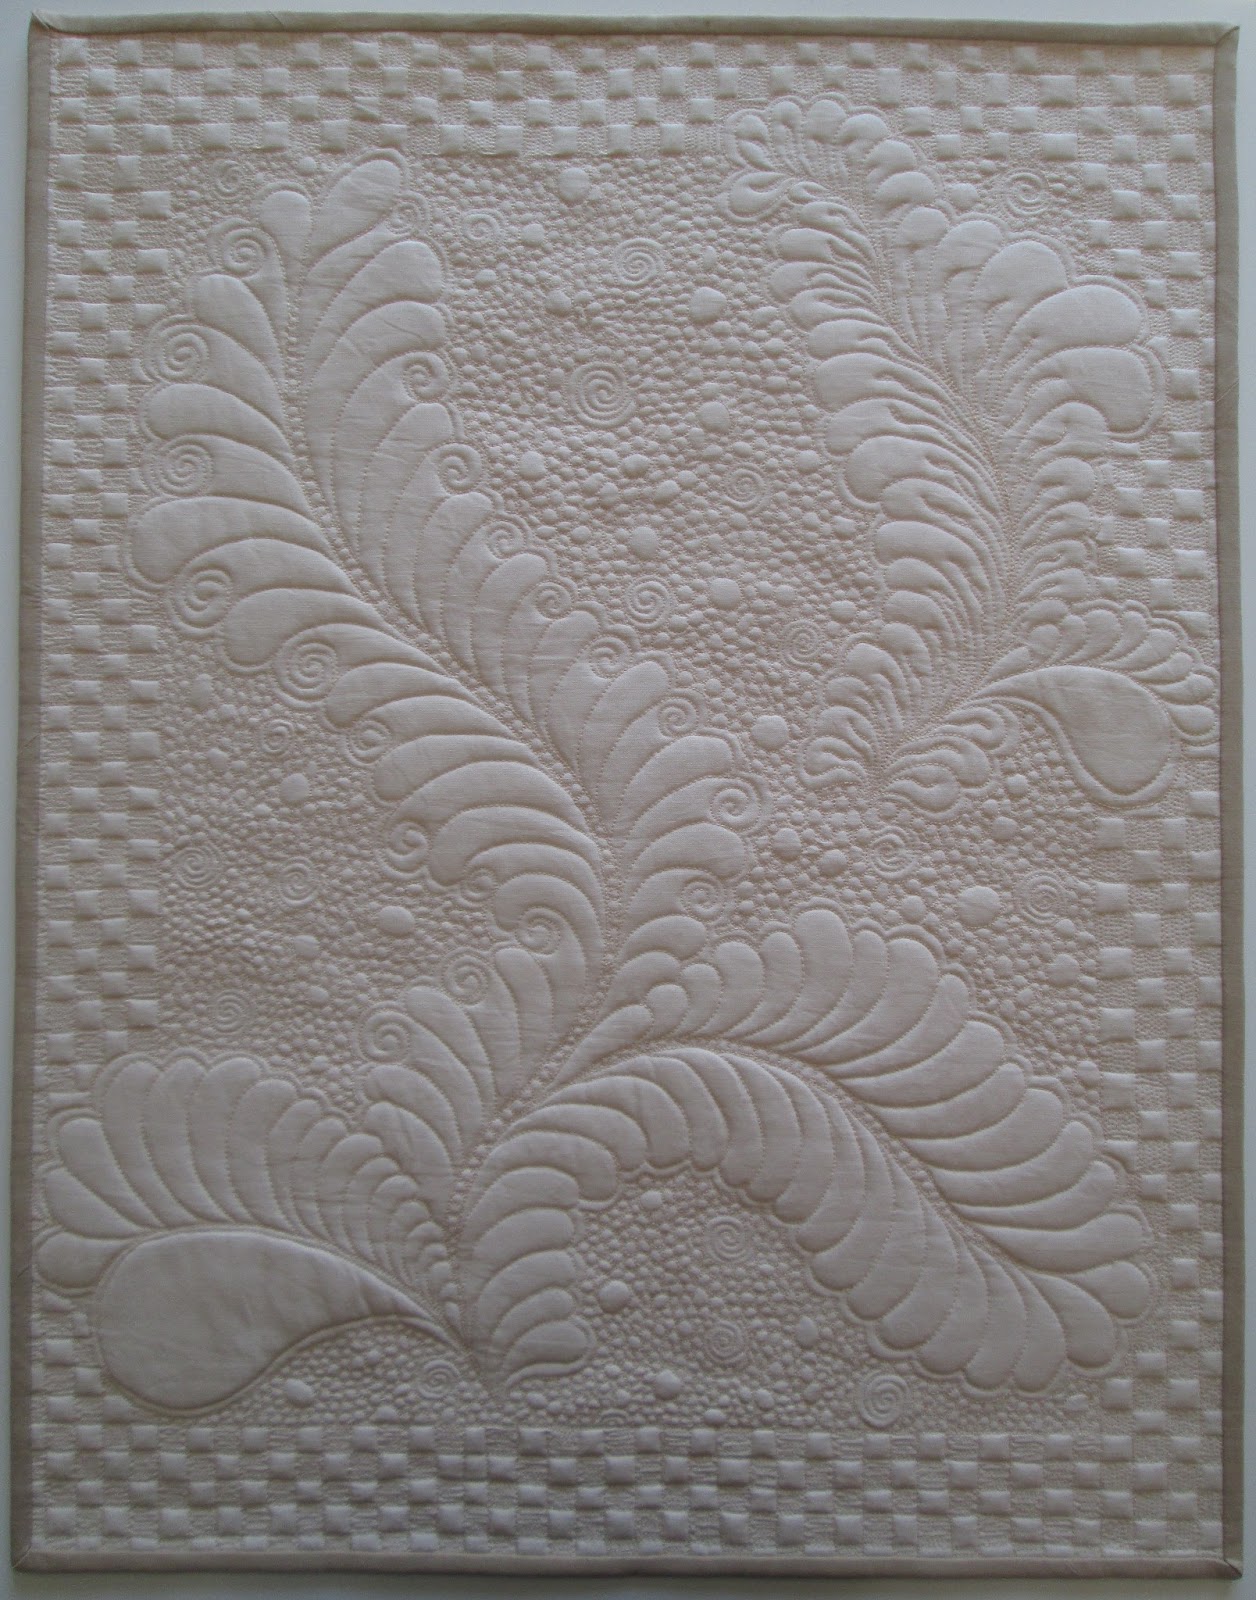
Remember last week I started with my practice pieces for the feathers challenge, hosted again this year by SewCalGal and I showed you a bit of my practice quilt sandwiches.  Well, I am done with my final piece that I'm submitting to the challenge.  I am happy and proud to show you some pictures.  I must say I am very pleased with what I've done.  


For my final piece I used a fat quarter.  Before I started quilting, I marked the stem lightly using the tip of a knitting needle.  From there I just went with what felt right.  I preferred to add echo stitches all around the feathers.  That way they have a more 'finished' look instead of adding the background quilting right up against the feathers.

I tried to vary the feathers a bit, by keeping some plain without adding any fancy additions.  Some I stitched every second lobe/petal with swirls on the inside and also stitched wiggly lines inside of the others.  You'll also notice that one feather's stem I stitched pebbles/pearls inside and the other I kept plain.

The background I wanted to have a dense filler design to have the feather pop out a bit more and decided on pebbles.  Every now and then I made the pebbles a bit larger and added swirls to change it up a bit.  I do however think I should have done something else instead of the checkerboard design on the outside, since I stitched it out free hand without any markings the lines did not end up super straight, which in the end when you square up the quilt, it appears skew and wonky.

The finished size measures 17¼ inches by 22¼ inches

Below I've added pictures of my practice pieces, if you'd like to read up on the process of how I've decided what to quilt, you can find it all HERE.  Note these samples are all 9 inches by 10½ inches.


If you'd like to join in on this specific feathers challenge click on this LINK, there you'll find all the rules, tips and guidelines to help you along.  I will also be linking up this blog post to that link to submit my piece.  

SewCalGal is also hosting other challenges which you can find HERE. 

Follow on Bloglovin


Ps.  A big thank you to everyone who linked up to my 'Anything Goes' linky party this past week

Happy quilting.

Friday, 3 May 2013

FMQ Challenge - Feathers (WIP)

SewCalGal is again hosting a few challenges this year.  The one I was quite eager to try out is the feathers challenge.


I really enjoy quilting feathers, and after taking Angela Walters Free Motion Quilting with Feathers on Craftsy, I felt a lot more confident to try it out.  I love the motion of quilting feathers, and the look is so elegant and adds so much texture.


To find all the guidelines and tips for this challenge, click HERE.


So I started out by making a few quilt sandwiches cutting a fat quarter into four pieces.  


First I  quilted different styles of feathers, adding background fillers to fill in the sample.  Here I added swirly lobes to the feather, and inside the stem I quilted pebbles/pearls.   


This feather is quite curvy, and I find it very hard to add the petals/lobes of the feather on the inside curves, it never seem to work out the way it should.  So in my final quilt, I'll avoid adding curves that are too round.


This is the finished piece of the first feather sampler I made, note that these feathers are really small, the finished size of this mini quilt is 9 x 10½ inches.


My second sample I played around with a larger feather and concentrated a bit more on the background designs.


I really like the effect of the 'checker board' and the pebbles, so I'll definitely use that in my final quilt.

The next two samples  (same size as above)I still need to add binding, but I wanted to show you how I played around practicing my technique and getting into the motion of quilting feathers.


I've started quilting my final piece that I want to submit to the challenge, here is a sneak peak of what I've done so far.  

I really like quilting feathers, it is such a pretty design.  I sure hope to see more quilters joining in this challenge. This is so much FUN!


Happy quilting.

LinkWithin

Related Posts Plugin for WordPress, Blogger...