Showing posts with label fusible applique. Show all posts

Wednesday, 12 June 2013

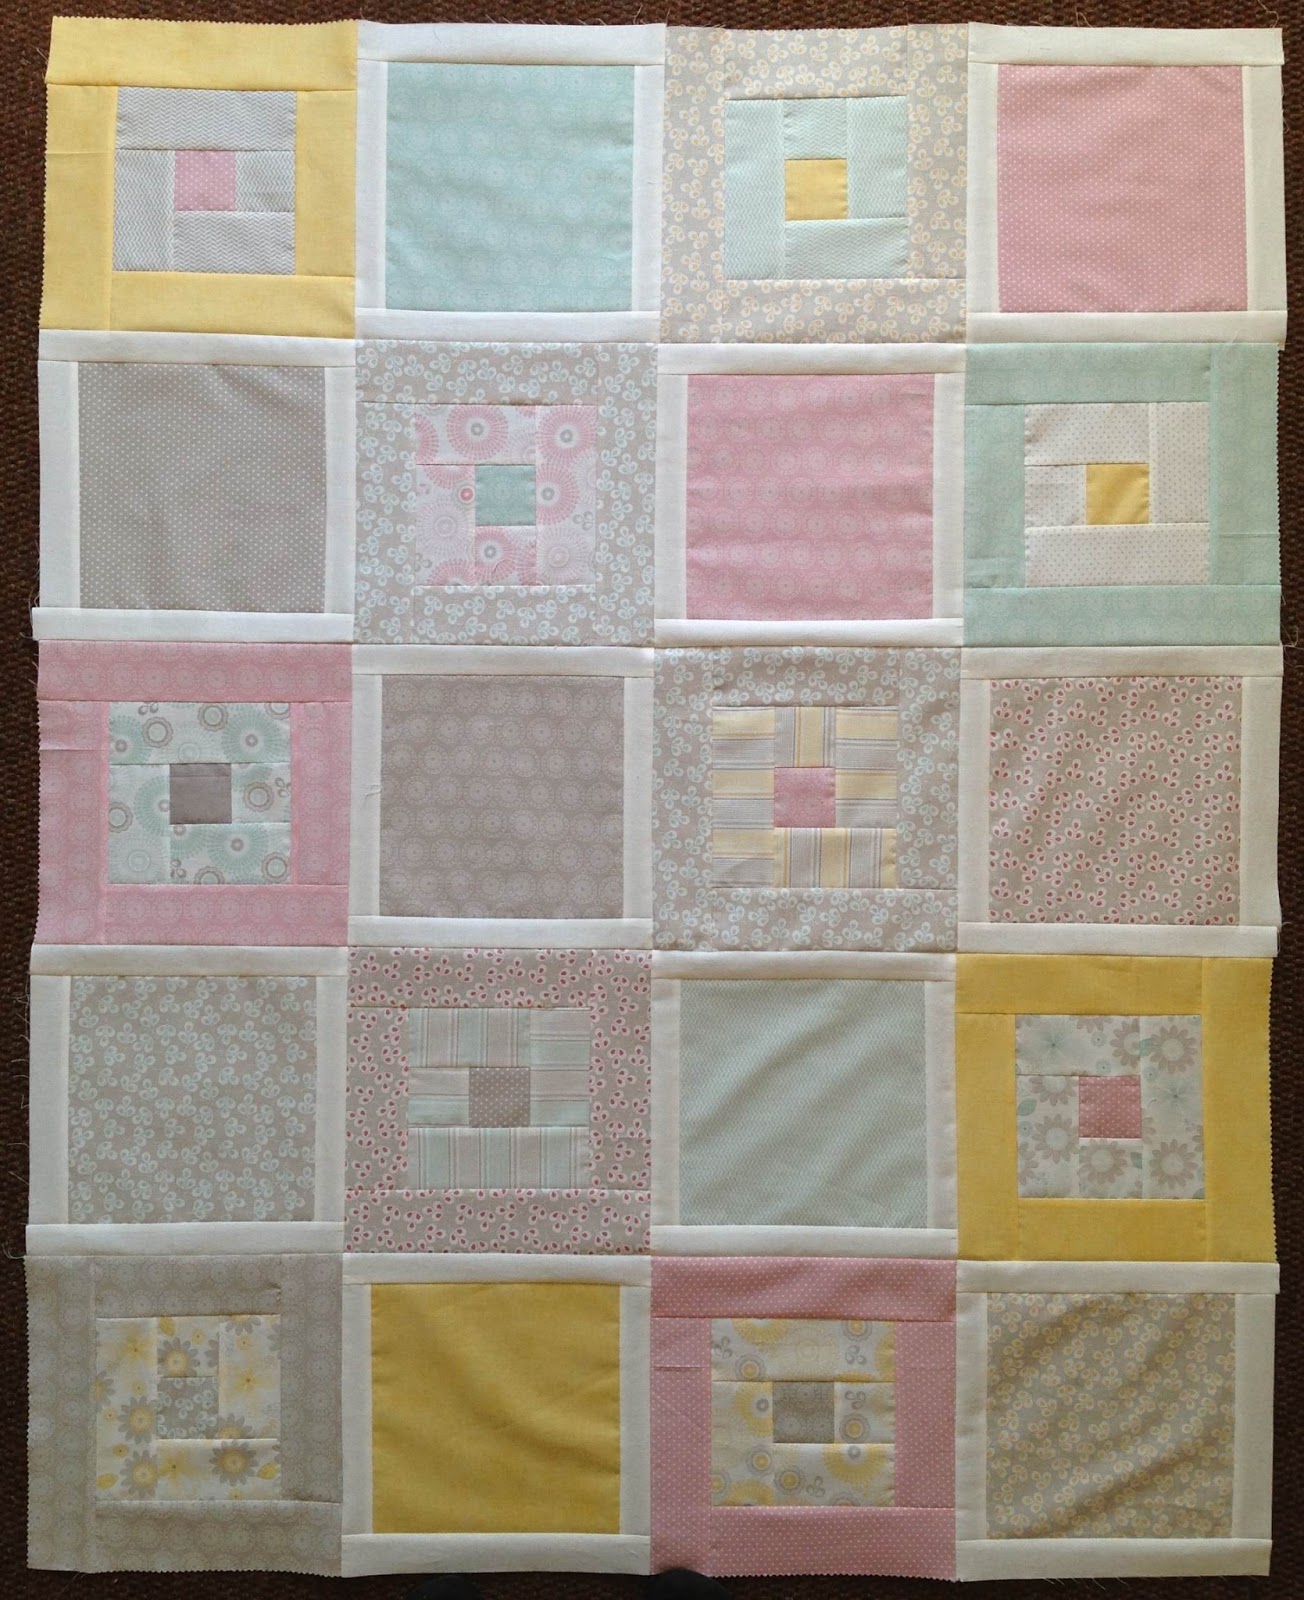
Finished baby quilt top..

Before I start sharing with you today's post, I want to thank each and everyone for linking up to this week's Anything Goes linky party.  We're at week 21, and so far its peaked at 22 link ups, the most since I've started this linky party, and more are added daily.  Remember its open for a full week, so be sure to come back and read the ones you've missed... 

...It is very gratifying when piecing a quilt, and everything just works out.  The seams match up, no need for adjustments or using my seam ripper.  Admittedly if not for a ¼ inch piecing foot it would be a lot more complicated. 


So all that was left to do, after I had all the blocks and hearts done for this baby quilt, was to start assembling the quilt top.  I did use quite a bit of pins to secure the rows before sewing them together.  The last thing I wanted was shifting and having to do it over again.


I was not too picky about placement, but I did try and match the blocks up in a way that it did not have the same print and colour in the same row.

Almost done, but not quite.. The last bit, was the outside borders.  To make sure I did not mix them up, as they were placed dark, light, dark, I worked in rows.  I also marked them with stickers to makes sure once the rows were completed to add it to the quilt exactly as planned.


Its completely sewn together and all that is left to do now, is basting it, and of course to start quilting.  I do however want to plan it out first and not jump right in.  There are quite a bit of negative space to fill, and I want to do a bit of custom quilting instead of a meander.

I don't yet have a full view of the quilt top, but will share it with you very soon.


If you'd like to read up on the process of this quilt that includes a few tutorials, you can find it here, here and here.


Happy quilting.

Friday, 7 June 2013

Hearts, hearts ... and more hearts ♥


On Wednesday I showed you how I made the padded hearts for the baby quilt I'm making, so it would only be fare to show you the small hearts that go into the border too.  I made these the exact same way as I did the small hearts for the valentines mini quilt I made.

I started out by piecing two different, 10 inch x 2½ inch strips of fabric together pressing the seams open.  I made a small heart template the same way as I did for the larger hearts (you can see how HERE) and traced 20 hearts on fusible applique, I used Wonder Under.  After I had all my strips sewn, and hearts cut out, I pressed the applique hearts (glue side down) on to the back of the pieced strips right in the center, making sure the inside- and outside points are right on the seam and  the bottom of the heart facing towards the inside.  
  

The rest is very simple, I cut out the hearts and they were ready to be used.  By placing the hearts points towards the inside of the strip, you end up with mirror image hearts, same fabrics, but they look different.  


Then it was time to sew the hearts onto the strips of white fabrics.  To make sure I got the hearts exactly right and spaced exactly the same, I placed the strips right next to each other, and pined the hearts at an angle, I would then peal back the paper from the fusible applique and place them on the fabric, and press them with a really hot dry iron.


To sew them on, I used a blanket stitch.  This part was a bit tricky, spacing the stitches just right, especially in the center of the heart, and the bottom point.  Not all of them came out perfectly but most came ended up looking just fine.


To hide the thread tails, I pulled the threads to the back, tied them in a knot and pulled it through the existing stitches.  Because the heart is fused to the white fabric, there was no way of hiding them between the layers, and I did not want to leave the threads to show, since its all white, I don't want the black threads to show up when quilting.


These strips are for the side borders and I still have to get the top and bottom done.


This part is quite time consuming, since I'm stitching the blanket stitch quit slow, making sure they end up exactly right.


Happy quilting.


LinkWithin

Related Posts Plugin for WordPress, Blogger...